
There’s painting your nails, and then there’s turning your nails into paintings. When you consider them to be little dinky canvases, it makes sense to apply some of the basic elements of art into our manicures. That’s exactly what the ‘gram’s latest nail art obsession does. The water-marbled mani looks like it could have been dreamed up by Vincent Van Gogh.
It combines the intricacy of luxe, swirled marble with the softness of watercolour. And, each individual nail is interpreted with different ripples to give it a truly unique finish. Impressive, right? But while it looks painstaking to apply, it’s easier to recreate than you’d think.
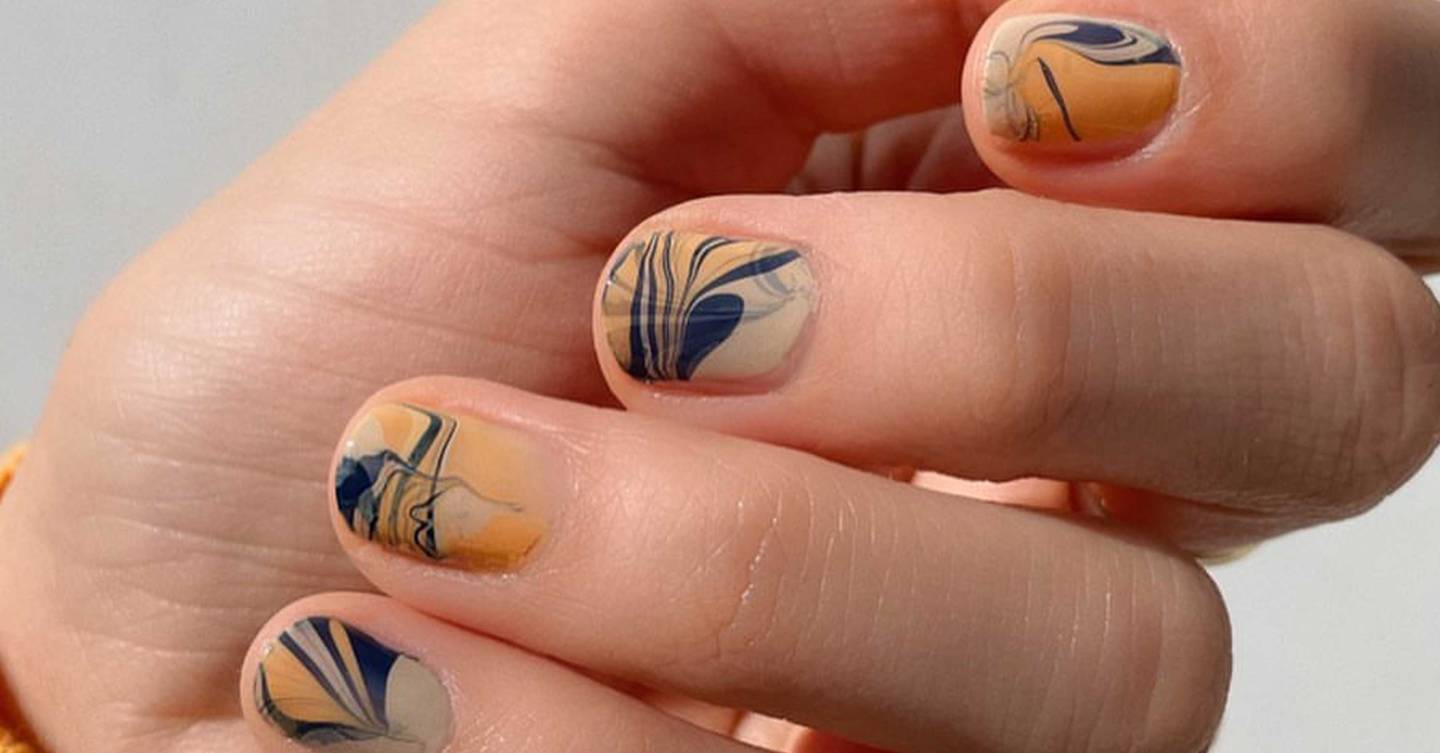
Nail pro, Betina Goldstein, let her followers in on a behind-the-scenes look at the bespoke mani, so we could see what goes into the pretty designs that end up on her grid. The method? Start with a tray full of water. Take your first nail polish colour and drop a bead of colour into the liquid. Let the shade bleed outward before dropping another shade into the centre. Once this has bled out, add another colour, then repeat until you have rings of colour in a pattern you’re happy with. Next take a cocktail stick and drag it through the colours to create a swirled design. Once you’re ready rotate your nail in the paint to pick the pattern up. You’ve only got one shot, since double dips don’t work.
We’ve seen this trick done with a few different shades. You can go for opposing colours like yellow and blue for high contrast, or stick to several gradients of the same shade, like Melanie at Overglow Edit, for a more subtle take on the trend. To finish, clean the skin around your nail up with some nail polish remover on a brush and set the design in place with a top coat.
If you’re struggling with the water-marble method, nail pro Michelle Humphries has an alternative. Paint three stripes of clear polish onto a palette or old dish, add three stripes of your first polish colour in between, then a second shade in the space left and a third shade on top. Using a cocktail stick, swirl the colours together. Add a topcoat of clear polish to your naked nail, then while it’s still tacky, take an old eyeshadow brush and scoop the marbled pattern onto your brush. Apply it to the wet top coat and allow it to blend. Once touch dry, add a top coat and you’re done.
Not a bad trick for mani novices, eh?
For more from GLAMOUR’s Deputy Beauty Editor, Elle Turner follow her on Instagram @elleturneruk.